The 500 Gallon Plastic Water Storage Tank For Emergency Water

poly tank 500 gallon, plastic water storage tank

Water should be near the top of your list when making emergency preps. You should plan to have at least two gallons per person per day to have a comfortable amount of water to survive major disasters.

You must check out bulk water delivery tanks to upgrade your emergency water storage.

500 Gallon Bulk Water Delivery Storage Tanks

There are a lot of options when it comes to bulk emergency water storage. Not all are suited to potable water storage. Consider the following characteristics to ensure you get the best water storage tank.

What Material is the water storage tank made from?

Potable water storage tanks must have food-grade high-density polyethylene (HDPE). BPA-free HDPE will not leach chemicals into your water, and it is highly durable.

Is the Water Storage Tank Impervious to Light?

The best water storage tanks also use dark green or blue HDPE resin, impervious to light penetration. Many tanks will incorporate UV inhibitors to further protect the water tank from degradation caused by sunlight.

Preventing water from being exposed to light will help avoid algae growth and keep your water fresh longer.

Many transparent or opaque storage tanks are on the market, but I’d avoid them for a reason above.

How is the Water Storage Tank Constructed?

Check with the tank manufacturer to understand how the water storage tank is constructed. The most durable tanks will be made using rotationally molded polyethylene resin.

This production method results in seamless vertical tanks. The seamless construction makes the water storage tank more durable and resistant to cracks.

Uses for 500 Gallon Water Storage Tanks

water storage tank, seamless construction, 500 gal poly tank
1500 gallon rainwater catchment system

Rainwater Collection Systems

These 500-gallon HDPE water tanks can be used for more than simple water storage. They make excellent tanks for rainwater collection. This allows you to harvest a massive amount of water from the roof of a building or house.

Incorporating a rainwater catchment system into your preps creates a renewable source of emergency water for drinking, hygiene, and garden water.

Fire Suppression

500-gallon water storage tanks make excellent fire suppression reservoirs. If your property or building is not attached to a primary water source, storing water for fire suppression is your direct option.

Polymer tanks make a durable and economical method to ensure you always have water to respond to fire emergencies.

FAQ

How much does a 500 gallon poly tank weigh?

Most polymer 500 gallon water tanks weight between 90 and 125lbs.

What is the largest poly tank?

The largest commercially available poly tanks hold up to 15,000 gallons of water.

How long will a 500 gallon water tank last?

The average life expenctancy of a polyethylene water tank is 15-20 years. Some tanks can last over 30 in the right conditions.

Are poly tanks cheaper than steel?

Yes, most poly tanks cost about 50% less than a similar size steel tank.

How big is a 500 gallon storage tank?

It depends on the brand but many cylindrical tanks have a diameter of 48 inches and height of 73 inches.

How much does a 500 gallon water tank weigh full?

About 4,270lbs.

Posted by Mike, 0 comments

Discover the Best Paracord Bracelet Patterns With Instructions & Cordage Tips

paracord bracelet, dog collar, woven, diy paracord bracelet patterns

Paracord is one of the most useful things you can keep in your survival kit. It’s incredibly versatile and robust while being lightweight and compact.

Paracord bracelets are convenient for keeping paracord with you wherever you go. The best paracord bracelet patterns provide a lot of cordage and look fantastic. Keep reading for more on the best paracord bracelet patterns with instructions.

What is Paracord?

When discussing paracord, we typically refer to Type III parachute cord or 550 cord. This cord has a tensile strength of 550 lbs which is why it’s known as 550 cord.

Paracord comprises seven inner strands of nylon rope with a nylon sheath protecting the inner strands. Due to the construction of paracord, it’s incredibly strong and versatile.

You can remove the inner strands and use them independently of the external nylon sheath. With one strand of paracord, you essentially have eight individual strands of cord you can use for many survival tasks.

How to Choose Paracord Bracelet Patterns

Choosing paracord bracelet patterns can be daunting. There are hundreds of possibilities. The patterns can vary by appearance, cordage amount, and size. Your wrist size can also impact which design may be best for you.

  • Amount of Cordage: Some paracord bracelet patterns use more paracord than others. Choose patterns to prioritize this characteristic if you want the most cordage available.

  • Wrist Size: You may want a smaller paracord weave if you have smaller wrists. Larger wrists tend to look better with thicker paracord bracelet patterns. Ultimately it’s up to you.

How to Choose the Right Paracord

bracelet, braided nylon strands, braided bracelet, the best diy paracord bracelet patterns

The type and amount of paracord necessary for making DIY paracord bracelets will depend on your pattern.

Creating paracord bracelets involves an element of trial and error. Still, the guidelines below will help you get it right the first time. Most patterns need about 12 inches of cord per inch of the bracelet, but this amount can change based on the following factors:

  • Cordage thickness

  • Pattern chosen

  • How tightly you weave your knots

  • The type of knot you choose. Some use more paracord than others.

If you’re a beginner, start with more paracord to give yourself room for error.

What tools and supplies are needed to make a paracord bracelet pattern?

You don’t need much to start making paracord bracelets.

Here’s what you need:

  • Paracord

Optional Supplies:

  • Buckles

  • FID tool (basically a large needle to aid weaving)

  • Dowel rod (required for some paracord bracelet patterns)

  • Weaving Jig

Measuring Your Wrist

paracord bracelet, bracelets woven, twisted bracelet

The first step to making a paracord bracelet is to measure your wrist. One of the best ways to measure your wrist is by wrapping a piece of paracord around it. Mark the cord and measure it.

Factors to consider when measuring for your parachute cord bracelet:

  • The finished paracord bracelet will be thicker than your measurement. 

  • Make your bracelet slightly longer than your measurement to accommodate the increased thickness of the finished bracelet.

  • If you are using a buckle, factor it into your finished measurement.

Paracord Bracelet Pattern Instructions

Cobra Weave

This is one of the most common paracord bracelet patterns. It’s also reasonably easy to make and offers many options to customize the look.

  • It’s easy to make

  • You can use more than one strand of paracord

  • Convenient size with a decent amount of cordage

Quick Deploy Cobra Weave

Unraveling the standard cobra weave is cumbersome. Check out this pattern if you want something much faster and easier to unravel.

  • Includes lots of stretch

  • Looser weave than most

King Cobra Weave

These are two cobra bracelets, with one woven over the other. This bracelet pattern is about twice as thick as a standard cobra weave. It’s relatively easy to make and affords a lot of cordage.

Quick Deploy Millipede

This paracord bracelet pattern is quick and easy to deploy. It’s also easy to make.

  • Thicker than the standard cobra

  • Includes more paracord

Adjustable Paracord Bracelet

This pattern is based on the cobra stitch but includes an adjustable knot. When wearing the bracelet pattern, it looks like one continuous piece.

  • More complex to make than the standard cobra

  • The adjustable knot is hidden while wearing

Fishtail Paracord Bracelet

This is the classic fishtail design. It’s easy to make and looks excellent with two paracord colors.

  • Decent amount of cordage

  • Easy to make

  • Looks cool

Katana Style Sword Wrap

This design is based on the wrap used on a Katana sword. It’s medium difficulty and includes a lot of cordage.

  • Thick and rigid design

  • It contains a lot of cordage

  • Works well for straps and on tool handles

Cetus Trilobite Paracord Bracelet

This pattern is a good option if you want a lot of cordage. It also uses a knot and loop for closure instead of a buckle.

  • Massive amount of cordage

  • Wide but flat pattern

Aztec Sun Bar Paracord Bracelet

For something unique, check out this design. It’s not the easiest to make but looks fantastic with two colors.

  • Unique design

  • Easier to make with a jig

Truck Tire

A wide and interesting design. This bracelet uses a lot of cordage and is moderately challenging to make.

Corkscrew Paracord Bracelet

This is a complex design but yields a very distinctive look using two colors.

Bane’s Cuff

This massive bracelet pattern contains a ton of cordage.

2 Strand Loop

A version of the fishtail paracord bracelet. It doesn’t use much cord but has a unique look.

Cats Claw

A complex design that uses a lot of cordage. Called cats claw because it resembles a curled cat claw.

Shark Jaw

The shark jaw design is easy to make and looks nice with a contrasting color.

FAQ

What does wearing a paracord bracelet mean?

Wearing a paracord bracelet doesn’t necessarily mean anything. Some survivalists, preppers, and backpackers wear them for emergency cordage. Other people just like the way they look.

How much cord is needed for a paracord bracelet?

It depends on how long it is. Many designs need about 12 inches of cord per inch of bracelet but this can vary dramatically.

What is the strongest paracord weave?

The strongest paracord weave is the King Cobra.

Do people still wear paracord bracelets?

Yes

What is the history of the paracord bracelet?

No one knows for sure but paracord has been in use since WW2. People. have probably been weaving it into things since then.

Is paracord OK to get wet?

Yes, paracord is fine to get wet. The paracord may shrink a tiny bit when it dries.

Posted by Mike in Gear and Supplies, 0 comments

Can You Use Expired Neosporin?

can you use expired neosporin, topical ointment, first aid

Neosporin is one of the most popular antibiotic ointments on the market. If you’ve ever had a cut or scrape, you’ve probably put Neosporin or similar antibiotic ointment on it at one point. Can you use expired Neosporin? Yes, you can still use it after the expiration date.

That Neosporin has an expiration date, like many things. Fortunately, the shelf life of Neosporin antibiotic ointment is quite long, but eventually, it will expire. Keep reading for more details on using expired Neosporin or other antibiotic ointments.

Neosporin Topical Ointment

Neosporin is a familiar brand of triple antibiotic ointment used to prevent infection of minor wounds. You may even have some Neosporin in your bathroom medicine cabinet right now.

A triple antibiotic ointment contains three main ingredients to kill bacteria and mitigate infection. The active ingredients are Bacitracin, Neomycin, and Polymyxin B.

Expiration Date: Does Neosporin Expire?

The FDA requires that all drug manufacturers put an expiration date on medications. Neosporin cream’s expiration date is about three years after it was made. Medication beyond its expiration date loses effectiveness or may sometimes become unsafe.

Can your Neosporin cream still be used if it is beyond its expiration date? The expiration date is a guideline, and the medicine may still be effective. Although, expired drugs can lose their effectiveness. Neosporin may still be safe and effective to use beyond its expiration date.

Is it Safe to use Expired Triple Antibiotic Ointment Like Neosporin?

Using expired Neosporin is generally safe. It will probably be effective if it is only a few months past the expiration date. Neosporin beyond its expiration date may not be as effective.

Neosporin that has expired for many years may not work and should probably be discarded.

All You Need to Know About Neosporin Storage Conditions

Store Neosporin in a cool, dry place for the maximum shelf life. Avoid storing Neosporin in areas that experience dramatic temperature and humidity changes, like your bathroom medicine cabinet.

I like to store my home first aid kit in a closet since it has a stable temperature and humidity. This area is also free of any light, which can cause medicines to degrade faster.

For information on storing things like food long term check out our post.

Overuse of Neosporin

koli bacteria, escherichia coli, bacteria, antibiotic resistance

Do not overuse Neosporin or other antibiotics. The overuse of antibiotics can contribute to the spread of antibiotic-resistant bacteria, making things like Neosporin less effective. Use the minimum necessary to get the desired effect.

First Aid Kits

Neosporin is an excellent addition to any first aid kit. It can be used on many common injuries to prevent infection. Pay attention to the expiration dates of your Neosporin and other medical supplies and rotate them as the expiration date nears.

accident, aid, band, minor cuts, skin irritation

How To Use Triple Antibiotic Cream Neosporin

  1. Clean the wound or cut.

  2. Apply a thin layer of Neosporin or another antibiotic ointment to the wound.

  3. Protect the injury with a bandage or sterile gauze.

  4. Change the bandage daily or more frequently if soiled until the wound heals.

How to use Antibacterial Ointments on Burns

  1. Remove any clothing covering the burn.

  2. Run cool water or a wet cloth on the burn for 10-20 minutes to reduce pain and swelling.

  3. Gently dry the burn and apply a thin layer of Neosporin.

  4. Protect the burn with a non-stick bandage or gauze.

  5. Change the dressing daily.

FAQ

Will expired Neosporin hurt you?

Probably not. At worst, the expired Neosporin won’t be as effective. It’s best to use non-expired Neosporin.

How long is Neosporin good after the expiration date?

Neosporin will probably still work fine a few months beyond the expiration date. Older Neosporin may not work well.

Is it OK to use expired antibiotic ointment?

Yes, if the ointment hasn’t been expired more than a few months it will probably work fine. Older ointment may not work at all.

Can I take antibiotics that expired two years ago?

No, antibiotics expired that long ago probably won’t work.

Posted by James Johnson in Gear and Supplies, 0 comments

How to Choose the Best Bug-out Location

city, transportation, storm, civil unrest, disaster scenarios, How to Choose the Best Bug-out Location

When SHTF, the last place you want to be is in a big city or large population center. Being surrounded by people desperate to survive a natural disaster will make things incredibly difficult. Evacuating or bugging out is an appealing strategy in many circumstances.

Bugging out is only sometimes possible and can be difficult, depending on the situation. Still, it is common sense and one of the best ways to protect your family from immediate danger.

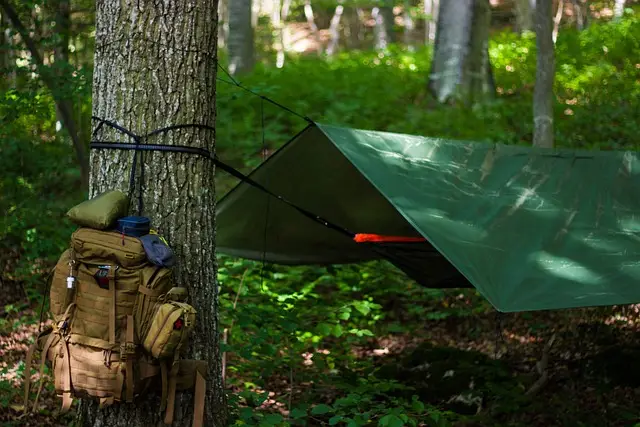
To bug out, you’re going to need a bug-out shelter or place to go. Let’s dive in and discuss bug-out shelters and how to choose the best bug-out location.

How to Choose the Best bug out Location

alpine hut, mountains, trees, own home

Bug out Location Proximity

The location of your bug-out shelter is critical to its overall livability in a disaster situation. You want to be able to get to your bug-out site despite many people trying to do the same.

You also don’t want your bug-out location to be too far away because getting there may be difficult. Consider that gasoline supplies may be limited, so you want to avoid driving for days.

There is a real possibility that traffic jams, downed power lines, and other obstacles will make driving to your bug-out shelter impossible. You should be able to walk to your bug-out location in a few days.

Isolation

The ideal bug-out location will be far from major cities and populated areas. Once the imminent danger of a nuclear war, man-made or natural disaster subsides, your greatest threat will be from desperate people.

Geography will vary by location, but places with thick tree cover will help obscure your presence. Mountains or other terrain features can provide concealment and impede people’s ability to access your territory. Having a bug-out shelter off the beaten path will reduce the chances of intruders and make it more difficult for people to find you.

Avoid address signs, mailboxes, or other features which may give away your current location beforehand.

Water Supply

flood, sign, downfall

Water is a critical resource, especially during an emergency situation. You want your bug-out location to have some natural water source like a stream or spring. Some water sources are seasonal, so check into this possibility.

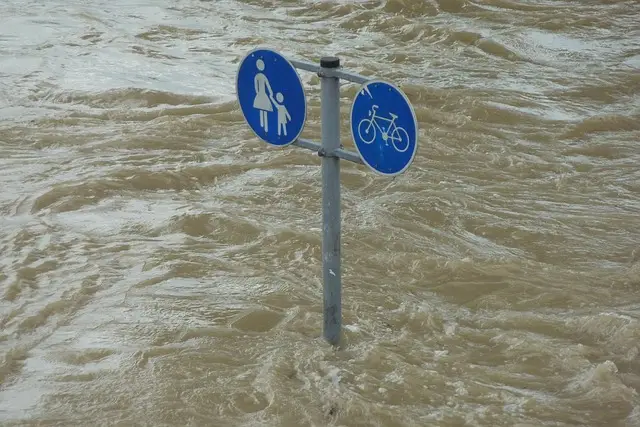
If you are near a stream or river, consider flooding risks. The last thing you want is for your bug-out shelter to get destroyed by flood waters.

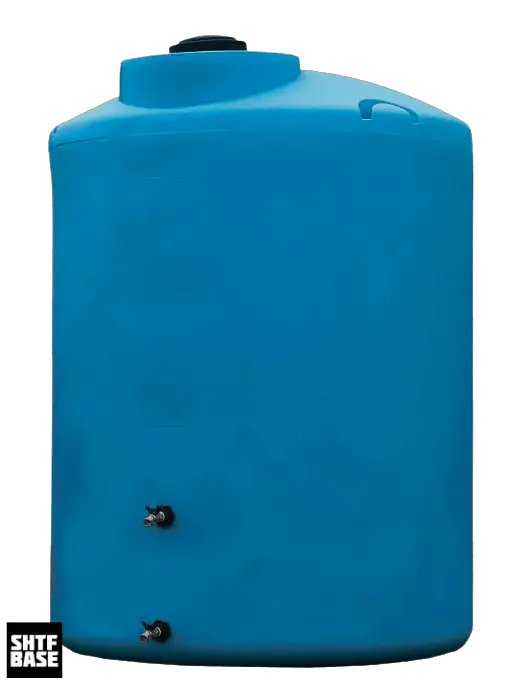
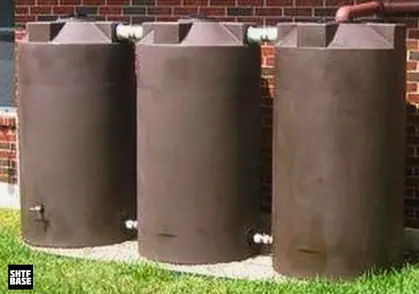
If your climate allows, you can collect your water using a rain catchment system to augment other water sources. Be sure to have an excellent way to store water long term to make the most of any rains or seasonal changes in water supplies.

Self-sufficiency

chickens, birds, poultry, own food

Does your bug-out location facilitate self-sufficiency? You will eventually run out no matter how many supplies you’ve stockpiled. The ideal bug-out location will help you keep minimal supplies to remain self-sufficient.

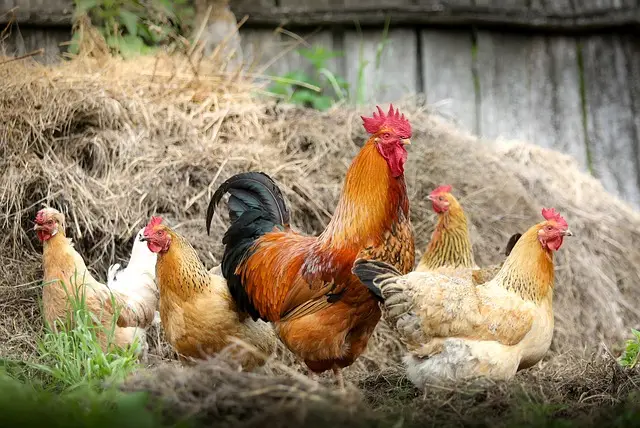
Good climate and soil quality will allow you to grow a garden for other food. Pasture or vegetation can be used to raise animals like chickens or goats. If there is a stream, you can generate electricity to power some things.

Many remote areas have wild game that can be harvested for supplemental food. The ideal bug-out shelter location should not work against you but complement your survival.

Robust Structure

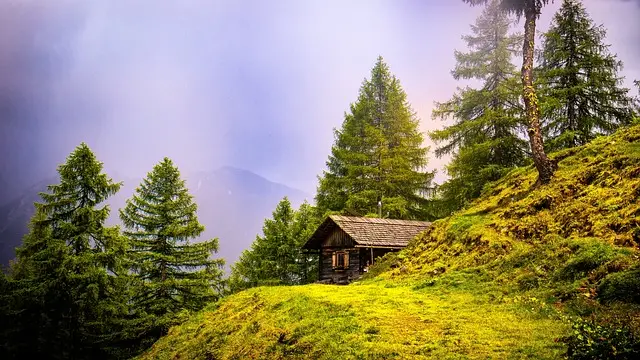
Suppose your bug-out location includes a house or other building. In that case, it must withstand the elements and not require substantial maintenance. The more durable your structure, the better. You won’t be able to drive to the local hardware store if something gets damaged.

Your bug-out shelter should be able to accommodate your family members and protect them from harsh weather. I have small children, so my needs are different than if I was by myself. My children won’t be able to tolerate the same temperature extremes as an adult.

Security and Self Defense

No matter how hidden or secluded your bug-out shelter is, there will always be the possibility desperate people will discover it. An ideal bug-out shelter will not only be physically resistant to intrusion, but your territory should be easily defended.

Self-defense is much more than just stockpiling guns and ammo. The ideal bug-out location will have all or some of the following characteristics:

  • Elevation to allow a good vantage of the surrounding territory

  • Natural barriers like cliffs, rivers, or rugged terrain

  • Geography and vegetation to obscure your presence

  • Viable routes for emergency evacuation

No bug-out area will be perfect, but you should be prepared to consider these factors when choosing a place for your bug-out shelter.

Protection From Natural Disasters

hurricane, devastation, charley

When choosing a location to bug out, evaluate the possible threats from natural disasters. Most places are at risk from some natural disasters, but ideally, you should choose the safest position possible.

Even if your area has natural disaster risks, you can take steps to mitigate the risk. For example, my bug-out shelter is in an area prone to forest fires. This can present a dangerous situation, but I have taken steps to reduce my risk by building fire breaks and cutting down some trees.

Be Familiar With the Area

Wherever you choose for your bug-out shelter, ensure you know the terrain and surrounding areas. If you relocate to a completely foreign location, it will make survival more difficult.

Spend time in your bug-out location to learn the area’s nuances before a disaster occurs.

How Long can you Survive in your Bug out Shelter?

boy, child, shelter

If you evacuate to your bug-out shelter or a safer location, things are probably pretty bad. Plan to be at your bug-out location for a long time. Months and even years are a possibility.

Do not plan on being able to get replenishments quickly. Major disaster and emergency scenarios will impact the complex logistics that enable modern everyday life.

Stores will not be open, and the gas company won’t be operational if things get bad enough.

Stockpile supplies for as long as your budget and sensibilities allow. Make sure you have a way to store things securely long term. Prioritize critical resources like water and water purification. Include a first aid kit and warm clothes in your emergency preparedness aid kit.

Affordability

Buying the best land for a bug-out shelter can be very expensive. That doesn’t mean you have to spend obscene amounts on the perfect survival property. Weigh the pros and cons of a potential area and determine what is most important to you.

Consider what is required to develop land for your needs. Cheaper land will generally require more work to develop. The work to develop land is expensive and will be reflected in the purchase price.

Getting land ready to build a cabin or other bug-out shelter is expensive and complex, depending on the terrain and other factors. Buying more expensive land may make more sense if it saves you the development hassle.

Land Development Legalities

You can’t just build a cabin on any piece of land. Significant permitting and environmental assessments are required in many areas. This permitting and inspections can be expensive and take months or even years before you can legally build on your land.

Ensure you understand your area’s requirements, or you may get a rude surprise when you learn how difficult and time-consuming it may be to develop your land.

None of this will matter after SHTF, but we’re trying to get things in order before a large-scale event occurs.

FAQ

What does bug out mean to preppers?

To bug out is to leave an area rapidly. The term is typically used when discussing evacuating an area if a man-made or natural disaster strikes.

What is bugging in?

Bugging is in to stay in your home or immediate area instead of bugging out (evacuating). Circumstances can dictate which option people choose.

Is it better to bug out or bug in?

It really depends on the situation. Some times it may be impossible to bug out. In many cases bugging out makes the most sense if you are able to and have prepared beforehand.

When would you need to bug out?

Major disasters like nuclear reactor melt downs and chemical spills are good examples of situations where it may make sense to bug out.

Posted by Mike in About SHTF, 0 comments

How to Prepare for war as a Civilian

apocalypse, catastrophe, end time, nuclear blast, world war

War is one of those things that you can’t imagine happening in your homeland. Since the cold war ended, we mainly see and hear about wars in faraway lands. In reality, war can happen anywhere, given the right circumstances. Let’s talk about how to prepare for war as a civilian.

The war in Ukraine has been raging for a year at this point. In the weeks and months before the start of the war, there was talk that a war may start. None of my family in Ukraine believed Russia would invade. And then SHTF.

Understand Your Geography

Geography plays a massive part in war and war zones. Where you live can affect what threats you may face should a war break out.

Do you live in the wilderness, away from military and strategic assets like power plants? Your preparation considerations will differ significantly from someone living in a major city or near strategic assets like military bases.

Assess your area to inform your prepping choices.

Preparing for war as a Civilian

Stock up on Essential Supplies

If a war breaks out, food, water, and other supplies will be hard to come by. The logistics machine that facilitates our daily lives will break down rapidly in a war zone.

Here is a short list of emergency supplies you should prioritize:

  • Warm and protective clothing

  • Water and water purification supplies 

  • Non-perishable food

  • First aid kit

  • Medication

  • Radios and communication gear

Know Where to Find Shelter

radioactive, danger, nuclear

Your home might be the best place to shelter should a war happen. Some areas have fallout shelters, bomb shelters, and other fortified structures to take refuge in should you need to leave your home.

In the case of nuclear war, finding shelter from fallout and radioactive material will be critical to surviving.

Many cities use subway tunnels, highway tunnels, and other underground places as emergency shelters. Take note of the options in your area should you need to use them.

Warning Signs of a war

A war can break out rapidly with little warning. Other times there are warning signs that something terrible may be on the horizon.

World War 2 had many warning signs prior to things becoming a full on war. In the case of Ukraine, the US and other countries spoke of a potential invasion for months before it happened.

In the US, we have a National Emergency Alert System, one of the standard ways the US government will communicate with civilians if disaster strikes.

Television broadcasts and radio stations will periodically test the Emergency Alert System. Pay attention when you hear the Emergency Alert System in case it’s not just a test.

Stay Informed

When things start getting spicy, stay informed of the developing situation. TV and radio news can be reputable sources of information. Twitter, social media, and other alternative media will generally have the newest breaking news if the situation changes rapidly. Many governments will use all media types to distribute information to the local populace.

Build Your Emergency Kits

outdoor, hammock, bushcraft, survival skills

FEMA recommends all households have emergency response kits in case disaster strikes. These kits are the minimum needed to survive a short time with limited emergency response personnel support.

A basic emergency kit should include the following:

  • Water (one gallon per person per day for at least three days for drinking and sanitation)

  • Food (at least a three-day supply of non-perishable food)

  • Battery-powered or hand crank radio and a NOAA Weather Radio with tone alert

  • Flashlight

  • First aid kit

  • Extra batteries

  • Whistle (to signal for help)

  • Dust mask (to help filter contaminated air)

  • Plastic sheeting and duct tape (to shelter in place)

  • Moist towelettes, garbage bags, and plastic ties (for personal sanitation)

  • Manual can opener (for food)

  • Local maps

  • Cell phone with chargers and a backup battery

  • Download the Recommended Supplies List (PDF) from FEMA

Get First aid Training

first aid kit, help, suitcase

All those fancy first aid supplies are only helpful with the knowledge to use them effectively. Knowing basic first aid can save the life of you or your family members.

StopTheBleed.org puts on excellent training classes on how to treat major wounds. Best of all, these classes are free! Additional paid training is available through many resources like the Red Cross.

Keep Some Cash on Hand for Emergencies.

ATMs and credit cards may not work during a major disaster due to internet and electrical outages. Having some paper money available can be helpful if you need to buy things.

Bug out or bug in

If a war or significant conflict erupts in your area, it may be best to leave or “bug out”. Getting away from the conflict zone will reduce the immediate threat to you and your family.

In a nuclear attack or reactor meltdown, getting away from the radioactive material can limit exposure to harmful radiation. The more hardened material and distance you can place between yourself and the radiation source, the better.

Bugging out may be ideal, but it can be challenging to leave a city due to traffic and other factors. You’re better off if you can at least get to a more rural or less populated area. Higher population density will worsen things because of the vast number of people trying to survive.

FAQ

What do I need to prepare for war?

You should make an emergency kit and consider prepping emergency food, water, clothes, medication, first aid, and other supplies.

How do civilians survive war?

Civilians primarily survive war by getting out of the immediate area of the conflict zone. People forced to stay, survive by having already prepared for a future disaster situation.

What to do during a war?

Leave the area if possible.

How to survive world war?

Prepare for world war by gathering emergency supplies. Get first aid and survival training prior to the war. Find an safer area to take shelter that is far from strategic assets like power plants and military bases.

Posted by Mike in About SHTF, 0 comments